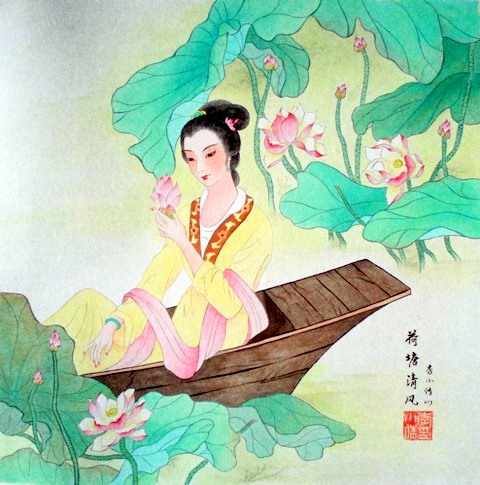
Gong Bi has many meanings. In the term 工笔 , Gong refers to “refined,” “meticulous,” “delicate.” 笔 generally refers to writing tools but also means “to write.” From this, we can already guess the style of painting associated with this term. The Gong Bi technique, therefore, focuses on finesse and precision in detail. It requires good technique and a lot of patience.
Materials and Supports
Gong Bi is practiced on non-absorbent paper or silk.
For the contours, a 狼毫 brush is used. There are mainly four types of Láng Háo brushes:
- The 红毛 (red hair) for thick lines.
- The 衣纹 (clothing folds) for long lines (such as the contours of clothing).
- The 叶筋 (leaf veins) for the contour of flowers and leaves.
- The 蟹爪 (crab claw) for the finest lines (such as dragonfly wings).
However, I strongly recommend using a small 小白规 brush. Master Wang Shuhui, famous for the finesse of his lines, used only a Xiǎo Bái Guī brush to trace all types of contours.
Two 羊毫 brushes are then needed: one for applying colors inside the contours, and the other, soaked in water, to blend and shade the colors.
Depending on the area to be colored, three brush sizes are used, which are named as follows:
- 大白云 (Large White Cloud) for large areas.
- 中白云 (Medium White Cloud) for medium areas.
- 小白云 (Small White Cloud) for small areas.
These three brushes all belong to the Yáng Háo category, but they are specific to the application of colors in Gong Bi.
The Different Stages of Gong Bi Painting
I. Sketching the Outline
Two methods are possible:
The first method involves sketching directly onto the paper you want to paint with a 2B pencil. However, because rice paper is very thin and fragile, you cannot really erase and redraw without damaging the paper. Therefore, you must get it right on the first try. Some minor corrections can be made by lightly erasing.
The second method involves first sketching on a regular drawing sheet (either Western or Chinese, it doesn't matter). This sheet is then placed on the paper you want to paint, with the sketch facing up. You then trace over the outline with a pencil, leaving an impression on the sheet underneath. This sheet will now have lightly imprinted outlines. You can then start painting. If the printed outlines are not visible enough, you can retrace them lightly with a 2B pencil. This method is slower but allows you to avoid damaging the rice paper and also to reuse the sketch for creating a similar painting.
II. Drawing the Contours
The contours are drawn with black ink using the brushes mentioned above. Care must be taken not to make lines of the same thickness. The thick and thin strokes are very important, and it is common to find artists who do not pay enough attention to this.
Finally, depending on the tone of color you plan to use for each part, you need to pay attention to the ink density for the contours.
III. Applying the Colors
This is done in several stages. Before starting each stage, you must ensure that the previously applied colors are completely dry. First, you apply the color with one brush, then with another soaked in water, you blend and shade the colors.
