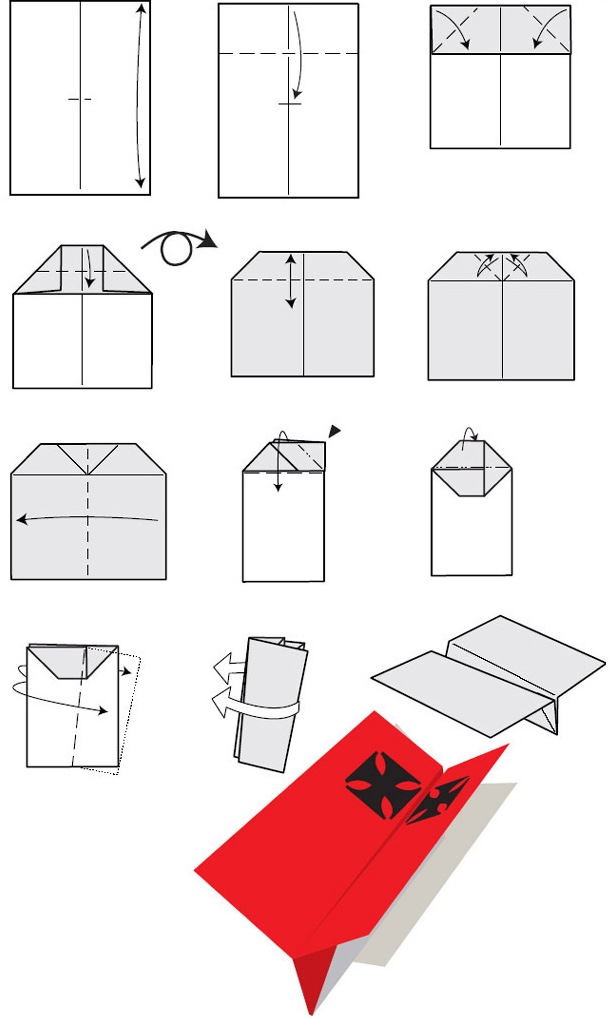
Here are the steps to make a square paper glider origami:

- Place the sheet in portrait orientation. Fold it in half vertically (left edge to right edge) to mark the vertical midline, then unfold.
- Fold the top edge down to the dotted line to create a band at the top.
- Fold the two top corners of this band toward the midline to form a "roof."
- Fold the small top point downward along the dotted line below the "roof."
- Turn the model over (back side facing you).
- Fold the top section down along the dotted line and crease well.
- Lift and fold the two small top flaps inward, one against the other, to lock the top.
- Fold the entire model in half along the midline (right to left), with the outside of the future plane on the outside of the fold.
- Flatten the small protruding point at the top by folding it down to lock everything in place.
- Form the first wing: fold the top layer diagonally (from the nose to the back) and crease the leading edge well.
- Turn the model over and repeat the same fold in mirror image to form the second wing.
- Open and align the wings flat. The plane is complete and ready to fly.